
Integrating with Property Manager
- Prerequisites
- Build & Deploy the Spin App
- Route traffic to the Spin Application Through an Akamai Property
This tutorial guides you through the process of integrating a Spin application - deployed to your Fermyon Wasm Functions account - with an existing Akamai Property for routing requests through your property to the Spin application.
The goal of this tutorial is to route a specific path on your existing property - e.g., https://www.mydomain.com/hello to the Spin application we’ll deploy to Fermyon Wasm Functions.
As this guide does not provide an introduction to Akamai Properties and the Akamai Property Manager, you may want to consult the Akamai TechDocs to learn more about the Akamai Property Manager - if necessary.
Prerequisites
This tutorial assumes that you have already accomplished the following:
- Created and Configured an Akamai Property within Akamai Property Manager
- Installed the
spinCLI
Build & Deploy the Spin App
We will use a pretty simple Spin application as part of this tutorial. Let’s use the spin CLI to create a new application using the http-js template and move into the application directory:
$ spin new -t http-js -a hello-fermyon-wasm-functions

$ cd hello-fermyon-wasm-functions
With the Spin application created and all necessary dependencies installed, let’s modify the implementation of the app. Go ahead and replace the contents of the index.js file (located in the src directory of your application) with the following lines of JavaScript code:
import { AutoRouter } from 'itty-router';

let router = AutoRouter();

router.get("/", () => new Response("Hello, Fermyon Wasm Functions"));

addEventListener('fetch', async (event) => {
    event.respondWith(router.fetch(event.request));
});
Once you’ve updated the src/index.js file, use the spin build command to compile your source code to WebAssembly and deploy the application to Fermyon Wasm Functions using the spin aka deploy.
$ spin build

$ spin aka deploy
Hint: You must be authenticated to use the
spin aka deploycommand. Use thespin aka logincommand to authenticate using your GitHub account.
The spin aka deploy command will generate an output similar to the one shown below:
Name of new app: hello-fermyon-wasm-functions
Creating new app hello-fermyon-wasm-functions in account your-account
Note: If you would instead like to deploy to an existing app, cancel this deploy and link this workspace to the app with `spin aka app link`
OK to continue? yes
Workspace linked to app hello-fermyon-wasm-functions
Waiting for app to be ready... ready

App Routes:
- hello-fermyon-wasm-functions: https://ec8a19d8-6d10-4056-bb69-cc864306b489.aka.fermyon.tech (wildcard)
Copy the URL from the output shown in your terminal, we’ll need it in a second to configure the Akamai Property.
Route Traffic to the Spin Application Through an Akamai Property
Next, we have to update the desired Property in Akamai. To do so, navigate to the Akamai Control Center, find your Akamai Property of choice and open its latest version, and press the Edit New Version button (located in the top right corner).
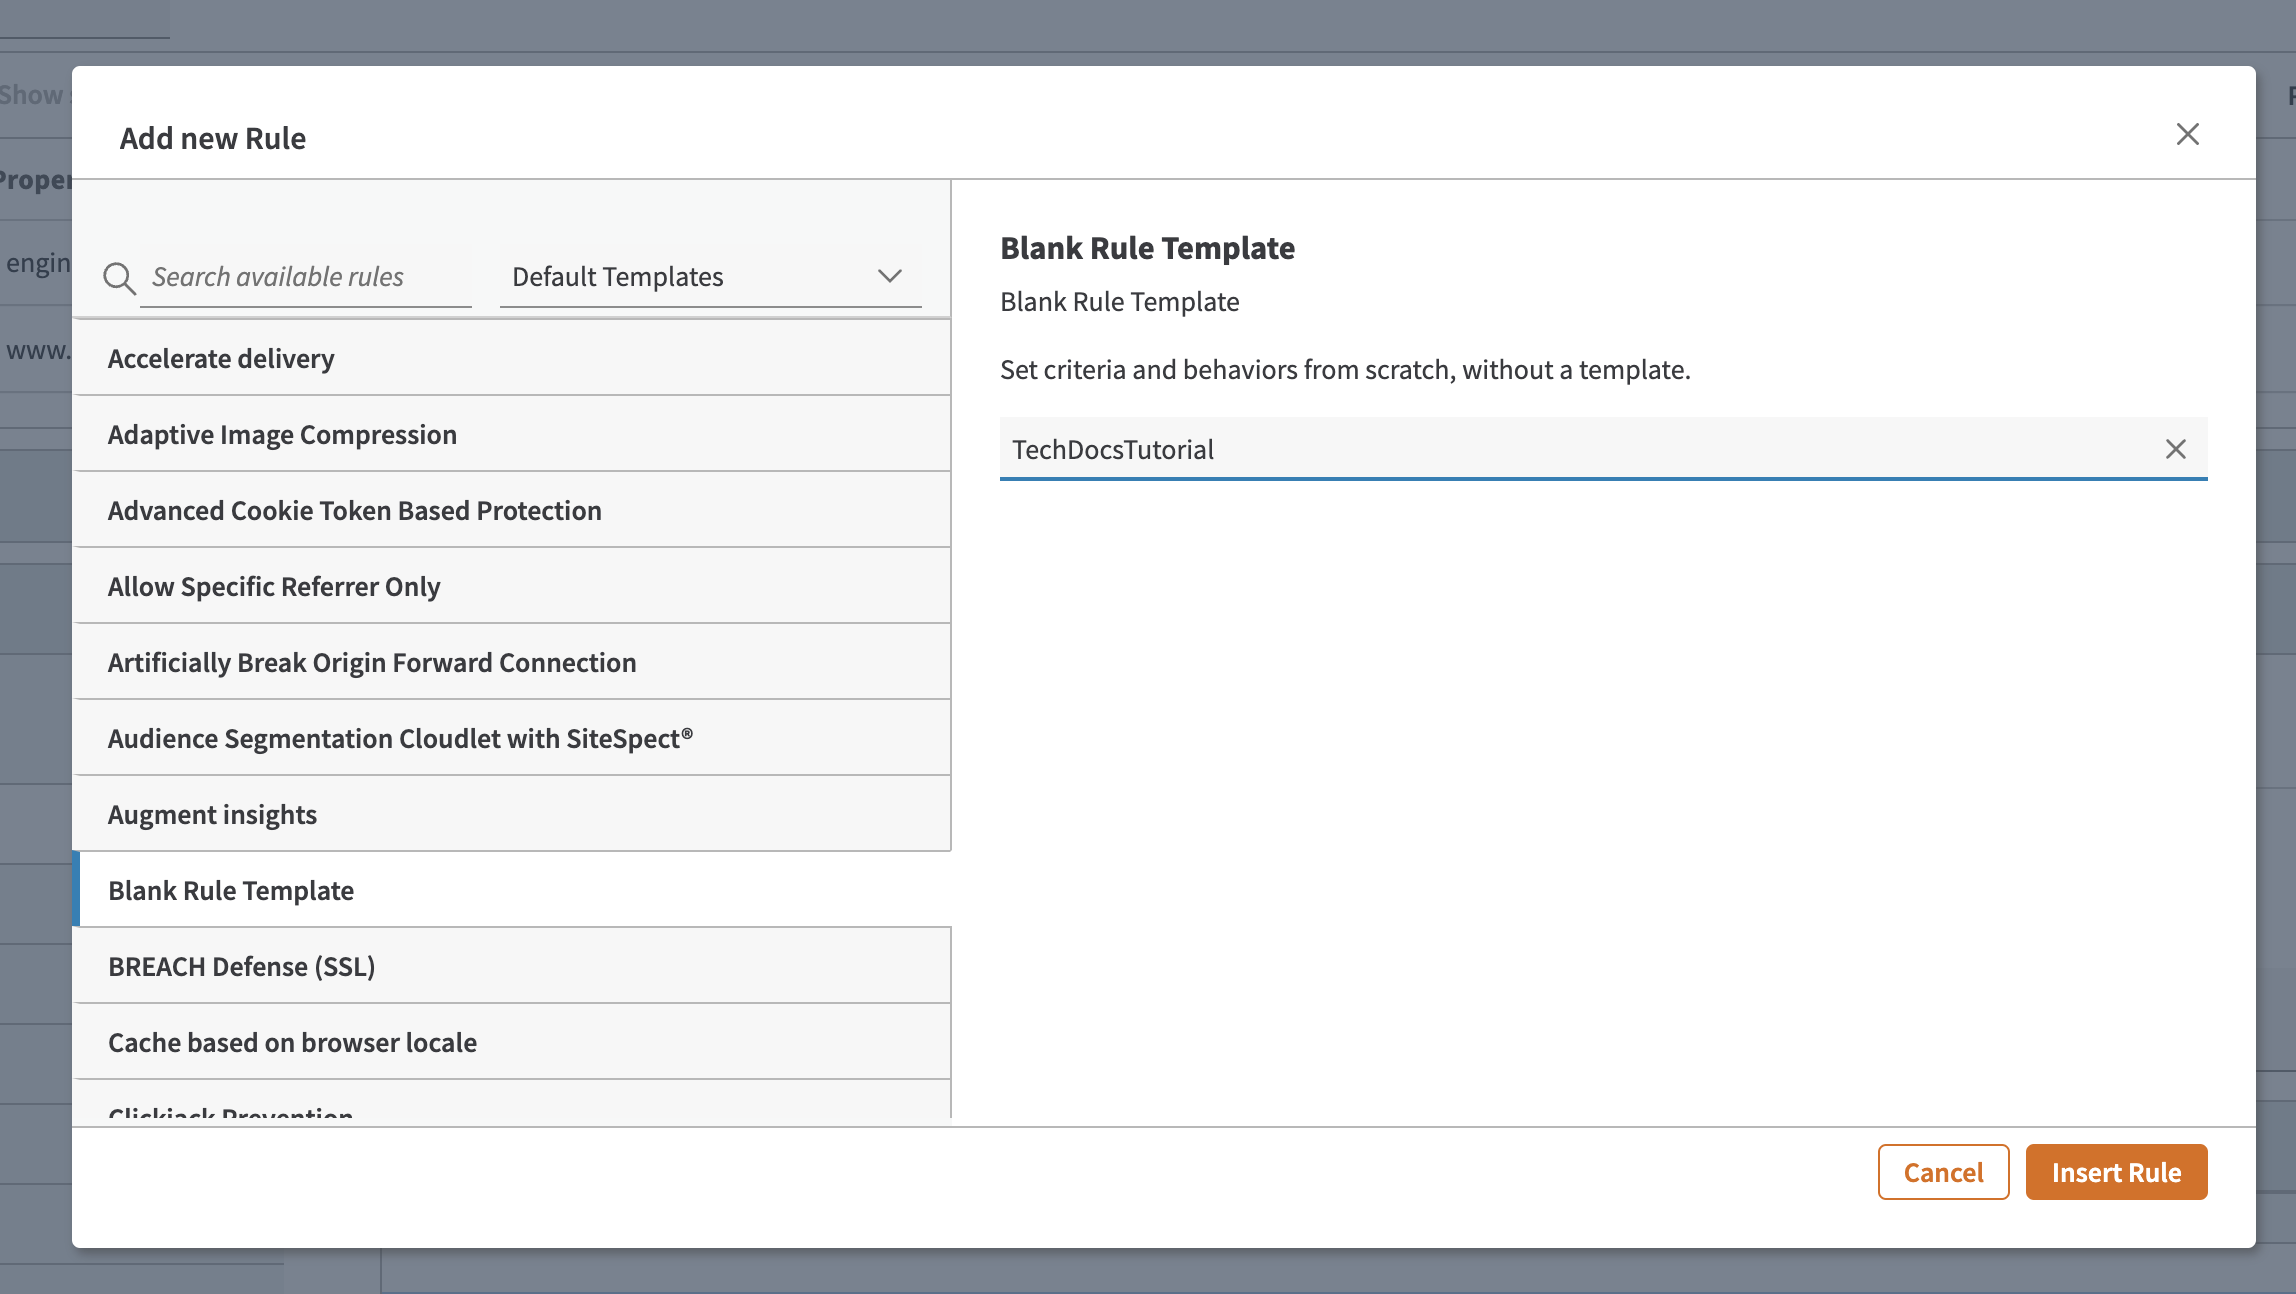
From the Property Configuration Settings click the + Rule button, select the Blank Rule Template and provide a name for the new rule.
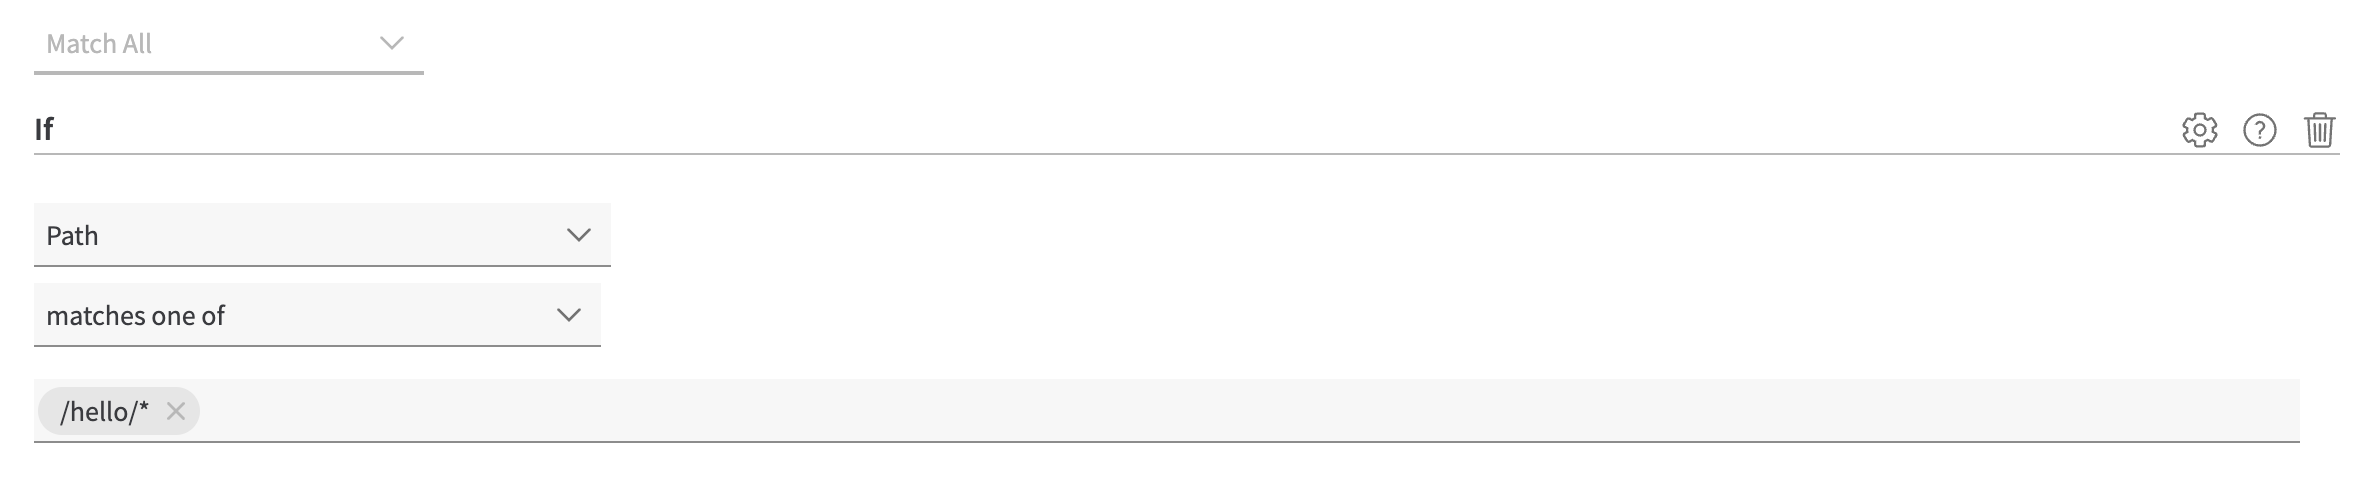
Next, add a new match condition using the + Match button, from the Criteria panel and configure it for Path to matches one of and add /hello/* as value:
With the match condition in place, we can move on and take care of adding custom behaviors using the Behaviors panel.
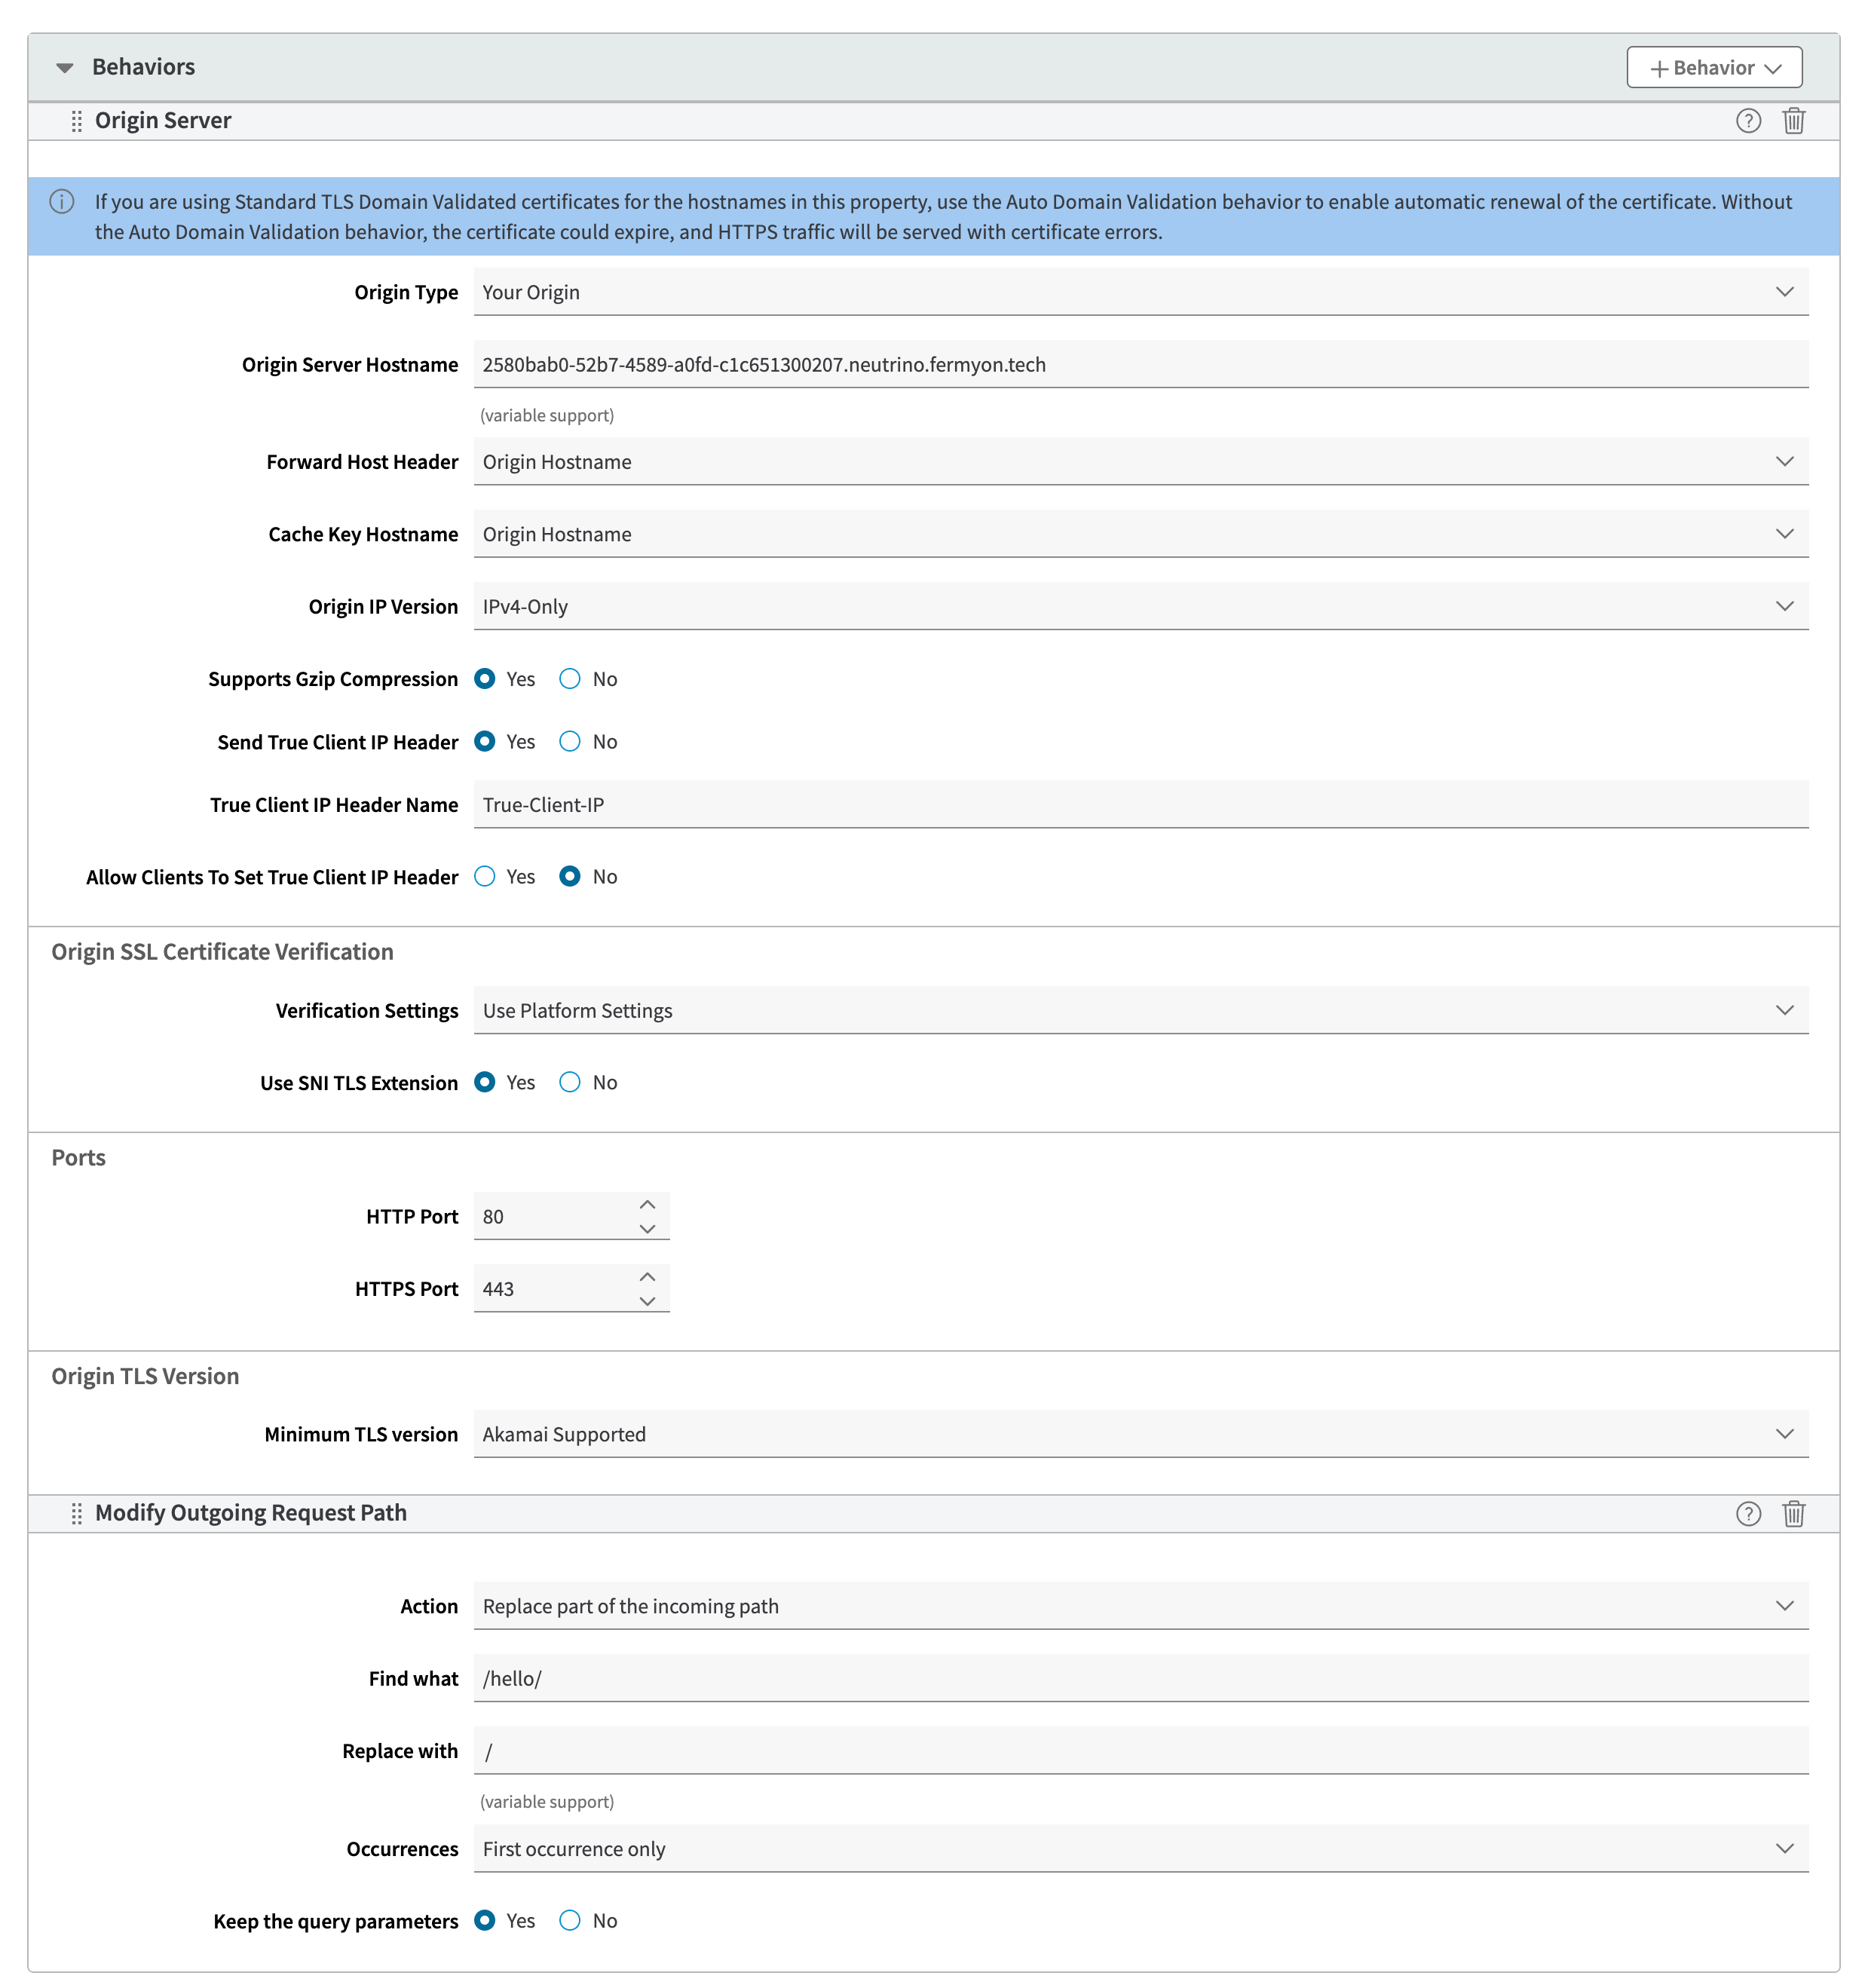
Let’s start by adding the Origin Server behavior using the Standard Property Behavior button from within the + Behavior drop-down button. We’ll leave the majority of properties unchanged. However, ensure to update the fields:
| Field Name | Desired Value |
|---|---|
| Origin Server Hostname | <origin* of your Spin application> |
| Forward Host Header | Origin Hostname |
*You can get the origin of your Spin Application by removing thehttps://prefix and the trailing slash (/) from the end of its URL.
Next, we want to prevent the Akamai Property from sending our chosen the routing criteria (/hello/) as path to the Spin application running on Fermyon Wasm Functions.
To do so, we add a Modify Outgoing Request Path behavior to our rule. Again use the Standard Property Behavior button from within the + Behaviors drop-down button. Update the following fields of the Modify Outgoing Request Path behavior:
| Field Name | Desired Value |
|---|---|
| Action | Replace Part of the incoming path |
| Find what | /hello/ |
| Replace with | / |
| Occurrences | First occurrence only |
| Keep the query parameters | Yes |
With both behaviors configured, your rule should look similar to the rule shown in this picture:
Persist the changes by pressing the Save button.
Activating the New Property Version
At this point, the new rule isn’t active, yet! We have to activate the latest version of our Akamai Property in order to make our changes take effect. Activate the latest version of your Akamai Property using the Activate tab.
Note: We highly recommend activating and testing the property modifications using the Staging environment instead of going straight to production.
Calling the Spin App Through the Akamai Property
To test the rule added as part of this tutorial, you can use a tool like curl tool and send a GET request to https://engineerd.xyz/hello/ (replace https://engineerd.xyz with the domain associated to your Akamai Property).
If the rule is configured correctly, we should see the same response being printed to stdout as if we would send a GET request to the root route of our Spin application deployed to Fermyon Wasm Functions:
$ curl https://engineerd.xyz/hello/
At this point, you should see Hello, Fermyon Wasm Functions being printed to stdout, indicating that you’ve successfully integrated a Spin application running on Fermyon Wasm Functions with an existing Akamai Property 🎉.